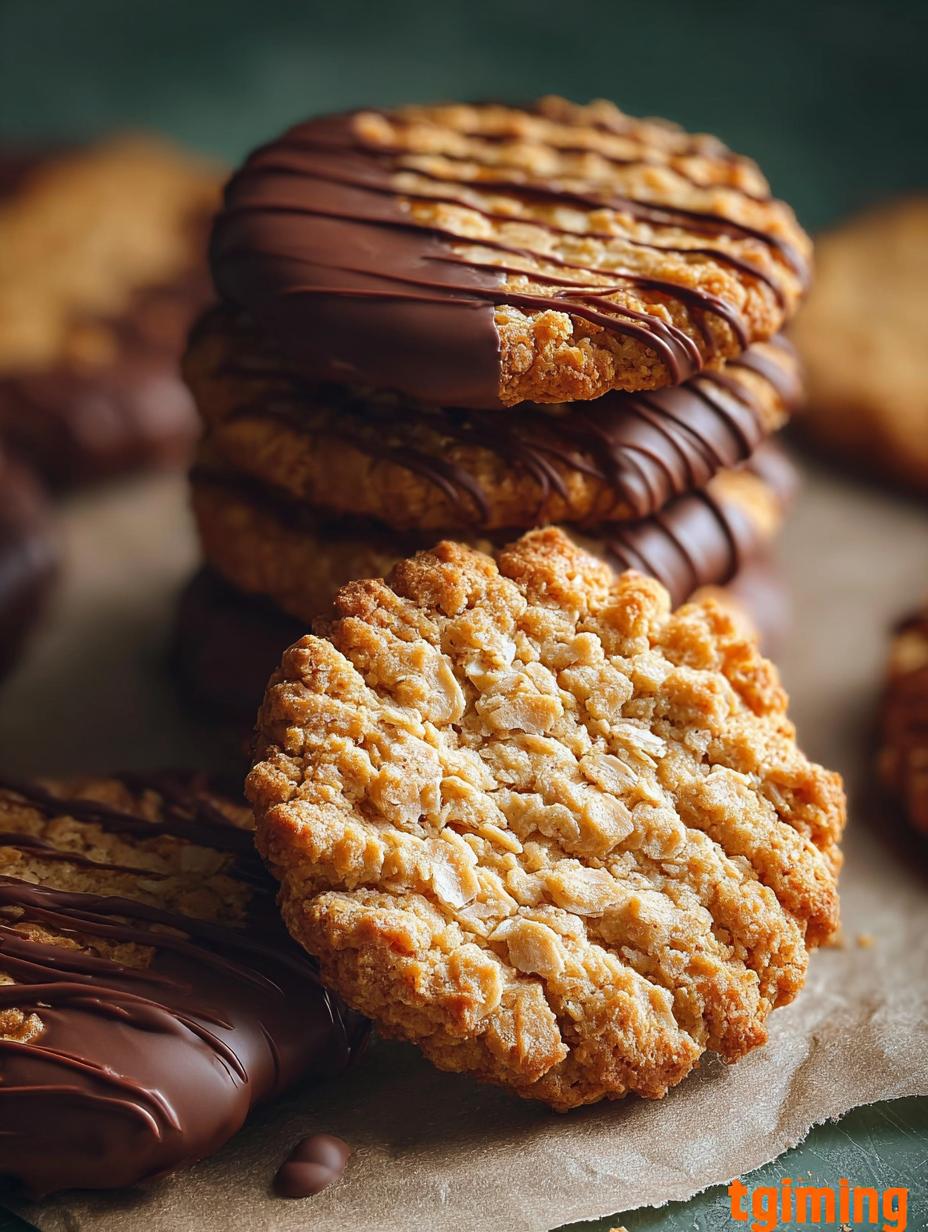
Chocolate Hobnobs has been a comfort food for me since childhood. I remember rainy afternoons in my grandmother’s kitchen, the warm scent of oats and melting chocolate filling the air as she pulled a fresh batch from the oven. These aren’t just any biscuits; they’re a hug in cookie form, with that perfect blend of chewy and crispy that makes you reach for another. I’ve discovered that making these homemade cookies is surprisingly simple, and the joy of sharing them with friends and family is unmatched. This easy chocolate oat biscuit recipe will bring that same warmth to your home. Let’s get cooking!
Why You’ll Love These Chocolate Hobnobs
I promise you, these homemade Chocolate Hobnobs will become a new favorite in your kitchen. They’re not just delicious; they’re a joy to make and share. Here’s why I think you’ll absolutely adore them:
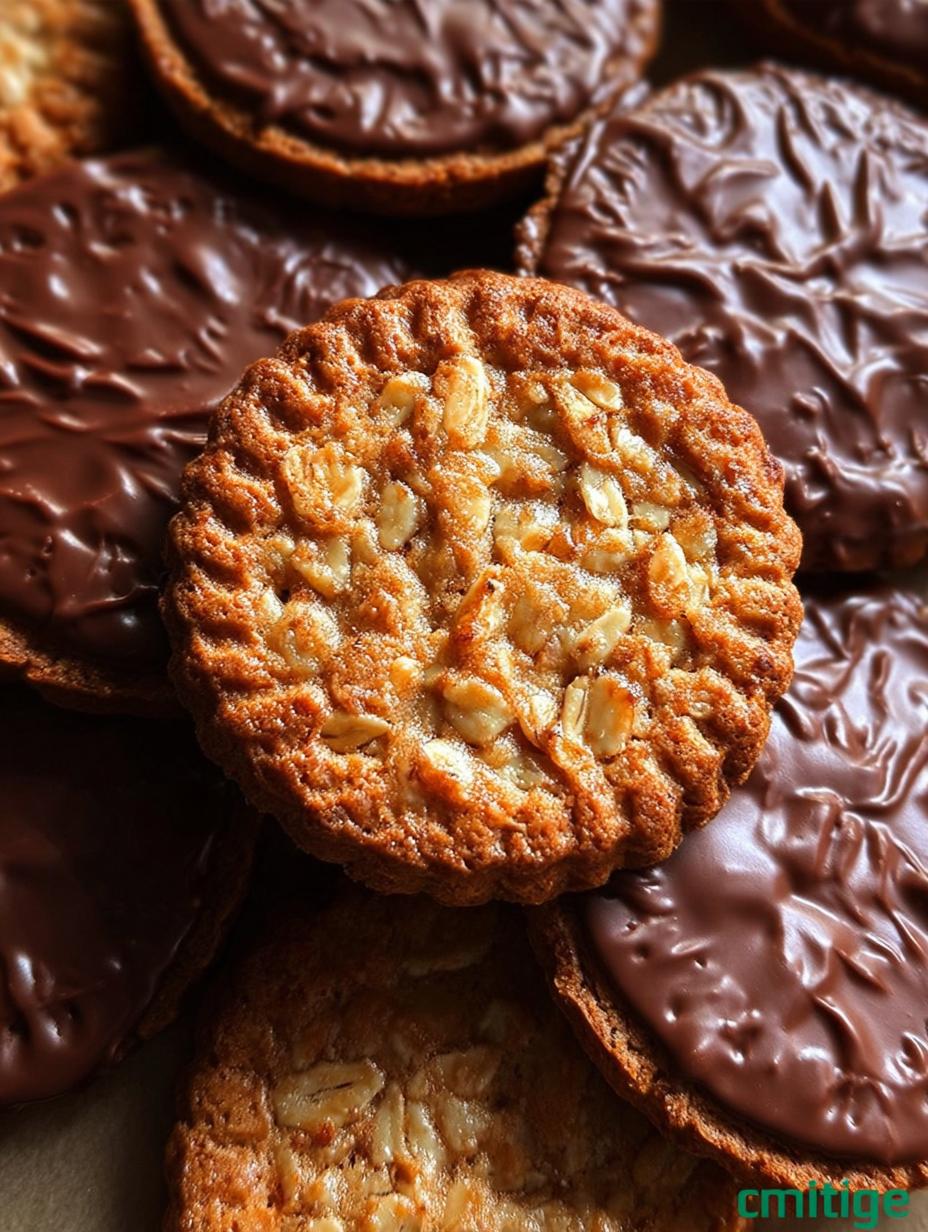
- They offer an irresistible combination of chewy oats and crisp edges, perfectly complemented by a smooth chocolate topping.
- My recipe is incredibly straightforward, meaning you can whip up a batch of these delightful oat cookies in no time.
- Made with wholesome oats, these biscuits offer a more satisfying and fiber-rich snack compared to many store-bought options.
- This recipe uses readily available and inexpensive ingredients, making it a budget-friendly treat for any occasion.
- Kids and adults alike will fall in love with these delightful oat cookies, making them perfect for family gatherings or after-school snacks.
- The aroma of baking oats and melting chocolate will fill your home, creating a cozy and inviting atmosphere.
Ingredients for Homemade Chocolate Hobnobs
To create these delightful British biscuits, you’ll need a few simple ingredients that come together to form that classic chewy-crispy texture. I’ve found that using good quality butter and fresh oats makes all the difference in achieving the perfect flavor and consistency for your Chocolate Hobnobs.
- 225g unsalted butter, softened – It’s crucial for creaming smoothly with the sugar.
- 150g light brown sugar – Adds a lovely caramel note and helps with chewiness.
- 1 tablespoon golden syrup – This is key for the authentic Hobnob flavor and texture.
- 1 teaspoon vanilla extract – Enhances all the other flavors beautifully.
- 150g rolled oats – The star of these oat cookies, providing that signature chew.
- 120g all-purpose flour – Gives structure to our delicious biscuits.
- 1/2 teaspoon baking soda – Helps with the spread and gives a slight lift.
- 1/4 teaspoon salt – Balances the sweetness and brings out the flavors.
- 200g milk or dark chocolate – For the irresistible topping on your Chocolate Hobnobs.
- 1 tablespoon coconut oil (optional, for chocolate melt) – Helps the chocolate melt smoothly and gives it a nice sheen.
How to Make Chocolate Hobnobs
Making these delightful Chocolate Hobnobs is a truly rewarding experience, and I’m excited to guide you through each step. You’ll find that creating this easy dessert is quite simple, and soon your kitchen will be filled with the wonderful aroma of baking oats and melting chocolate. Just follow my instructions carefully, and you’ll have a batch of perfect biscuits in no time!
- Step 1: First, you’ll want to cream the softened butter and light brown sugar together in a large mixing bowl. I use an electric mixer for this, beating them until the mixture is visibly pale and wonderfully fluffy. This step is crucial for a tender biscuit.
- Step 2: Next, mix in the golden syrup and vanilla extract. Continue beating until everything is thoroughly combined and the mixture looks smooth and glossy. The golden syrup adds that signature chewiness to our Chocolate Hobnobs.
- Step 3: In a separate medium bowl, whisk together the rolled oats, all-purpose flour, baking soda, and salt. I always make sure these dry ingredients are well combined to ensure even distribution throughout the dough.
- Step 4: Gradually add the dry mixture into your wet ingredients, stirring until a thick, cohesive dough forms. Be careful not to overmix; just combine until no dry streaks remain. You’ll feel the dough coming together beautifully.
- Step 5: Scoop tablespoon-sized portions of the dough. I like to roll each portion into a neat ball, then flatten it slightly with my palm before placing it onto a baking sheet lined with parchment paper. Make sure to leave some space between each biscuit.
- Step 6: For the best results and to prevent excessive spreading, chill your cookie dough in the fridge for at least 20 minutes. This little trick helps maintain their shape and gives you that perfect hobnob texture.
- Step 7: While the dough is chilling, preheat your oven to 175°C (350°F). Once ready, bake the cookies for 12–15 minutes. Keep an eye on them, as they should be golden brown around the edges and slightly softer in the center.
- Step 8: After baking, let the Chocolate Hobnobs cool on the baking tray for about 5 minutes. This allows them to firm up before you transfer them to a wire rack to cool completely. Handling them too soon can cause them to break.
- Step 9: Once the biscuits are completely cool, it’s time for the chocolate! Melt the chocolate (and the optional coconut oil) in a microwave-safe bowl in 30-second intervals, stirring between each, or over a double boiler until it’s smooth and luscious.
- Step 10: Finally, spread a generous spoonful of melted chocolate over the flat side of each cooled cookie. You can let the chocolate set at room temperature, or if you’re impatient like me, pop them in the fridge for a few minutes. Now you have a perfect easy dessert ready to enjoy!

Pro Tips for the Best Chocolate Hobnobs
I’ve made countless batches of these delightful biscuits, and I’ve picked up a few tricks along the way that I’d love to share with you. These expert tips will help you achieve the absolute best Chocolate Hobnobs every single time, ensuring they’re perfectly crispy, chewy, and utterly delicious.
- Always use good quality rolled oats; instant oats won’t give you the same texture.
- Don’t skip chilling the dough; it prevents spreading and ensures a sturdy biscuit.
- Allow the biscuits to cool completely before adding the chocolate topping for a clean, non-messy finish.
- Adjust baking time slightly for your oven; watch for golden edges, not overly dark brown.
- For extra depth of flavor, lightly toast your oats in a dry pan before mixing them into the dough.
What’s the secret to perfect crispy-chewy Chocolate Hobnobs?
The magic truly lies in the combination of rolled oats and golden syrup. The oats provide that wonderful chewiness, while the golden syrup contributes to both flavor and a slight crispness around the edges. Chilling the dough also plays a vital role in setting these Chocolate Hobnobs just right, preventing them from spreading too thin.
Can I make Chocolate Hobnobs ahead of time?
Absolutely! I often prepare the dough for my Chocolate Hobnobs a day in advance. Simply form the biscuits and store them unbaked in an airtight container in the refrigerator for up to 24 hours. When you’re ready to bake, just pull them out and add a few extra minutes to the baking time if they’re very cold.
How do I avoid common mistakes with homemade oat cookies?
One common pitfall is overmixing the dough; this can lead to tough oat cookies. Mix just until combined. Another mistake is baking at too high a temperature, which can burn the edges before the center is cooked. Finally, ensure your butter is truly softened, not melted, for the best dough consistency for your Chocolate Hobnobs.
Best Ways to Serve Chocolate Hobnobs
There’s nothing quite like enjoying a freshly baked Chocolate Hobnob, and I’ve found a few ways that truly elevate the experience. These delightful biscuits are incredibly versatile, perfect for various occasions and pairings. I love seeing how simple additions can turn a humble biscuit into a memorable moment.
My absolute favorite way to enjoy these is alongside a steaming mug of English breakfast tea. They are quintessential tea time treats, perfect for dunking! The rich chocolate and wholesome oats soften beautifully in hot tea, creating a comforting bite. For a more indulgent treat, I sometimes pair them with a scoop of vanilla bean ice cream, allowing the biscuit’s warmth to slightly melt the ice cream.
They also make a fantastic addition to a dessert platter with fresh berries or a dollop of whipped cream. These Chocolate Hobnobs are also wonderful as an after-dinner treat with a strong cup of coffee. No matter how you serve them, they’re sure to bring a smile to anyone’s face!
Nutrition Facts for Chocolate Hobnobs
I know many of you are curious about what’s in these delicious treats, so here’s a breakdown of the nutritional information for my homemade Chocolate Hobnobs. Please remember that these values are approximations and can vary slightly based on the specific brands and precise measurements of ingredients used in your kitchen.
- Serving Size: 1 cookie
- Calories: 160 kcal
- Protein: 2g
- Fat: 9g
- Saturated Fat: 5g
- Unsaturated Fat: 3g
- Trans Fat: 0g
- Carbohydrates: 18g
- Fiber: 1g
- Sugar: 9g
- Sodium: 60mg
- Cholesterol: 20mg
Nutritional values are estimates and may vary based on specific ingredients used.
How to Store and Reheat Chocolate Hobnobs
Once you’ve baked a batch of these delicious Chocolate Hobnobs, it’s important to store them correctly to maintain their freshness and that perfect crispy-chewy texture. I always make sure they’re completely cool before putting them away. This prevents any condensation from forming inside the container, which can make your lovely chocolate biscuits soggy.
For short-term storage, place your cooled Chocolate Hobnobs in an airtight container at room temperature. They will stay fresh and delicious for about 3-4 days this way. If you want to keep them longer, you can pop the container in the refrigerator, where they’ll last for up to a week. I find they taste just as good chilled!
If you’ve made a big batch (which I often do!), these chocolate biscuits freeze beautifully. Simply layer them between sheets of parchment paper in a freezer-safe airtight container or bag. They’ll keep well in the freezer for up to 3 months. When you’re ready for a treat, just thaw them at room temperature for an hour or so, or for a warm, gooey center, you can gently reheat them in a microwave for 10-15 seconds or in a preheated oven at 150°C (300°F) for 5 minutes.
Frequently Asked Questions About Chocolate Hobnobs
Can I substitute ingredients in Chocolate Hobnobs?
Yes, to a certain extent! For the golden syrup, if you can’t find it, a light corn syrup or even honey can be used, though the flavor profile of your Chocolate Hobnobs might subtly change. For the butter, a good quality plant-based butter alternative works well for a vegan version. Just ensure your substitutions maintain the texture needed for these classic British biscuits.
How do I get the chocolate topping perfectly smooth on my Chocolate Hobnobs?
The trick to a perfectly smooth chocolate topping for your Chocolate Hobnobs is gentle melting. I recommend using a double boiler or melting in the microwave in short bursts (15-30 seconds), stirring after each interval. Adding a tiny bit of coconut oil, as suggested in the recipe, also helps create a beautiful, glossy finish that sets nicely on these delicious chocolate biscuits.
Why are my homemade Chocolate Hobnobs spreading too much?
There are a few reasons your Chocolate Hobnobs might be spreading. First, ensure your butter isn’t too soft or melted; it should be softened but still cool to the touch. Second, don’t skip the chilling step! Chilling the dough for at least 20-30 minutes firms up the butter, which prevents excessive spreading in the oven. Finally, make sure your oven temperature is accurate; too low a temperature can also cause over-spreading.
Variations of Chocolate Hobnobs You Can Try
I love experimenting with recipes, and these Chocolate Hobnobs are no exception! While the classic version is truly delightful, there are so many ways to customize them to suit your taste or dietary needs. These variations make for fantastic snack recipes and can add a fun twist to your baking routine.
- Nutty Hobnobs: For an extra layer of flavor and crunch, try adding 1/2 cup of finely chopped nuts, like pecans or walnuts, to the dough. This creates a more robust biscuit that’s perfect with coffee.
- Vegan Chocolate Hobnobs: Easily make these dairy-free by swapping the unsalted butter for a plant-based butter alternative and using a good quality dairy-free chocolate for the topping. The texture remains wonderfully similar!
- Spiced Hobnobs: Introduce a hint of warmth by adding 1/2 teaspoon of ground cinnamon or a pinch of mixed spice to the dry ingredients. This variation is especially cozy during cooler months.
- Double Chocolate Hobnobs: If you’re a true chocolate lover, fold 1/2 cup of chocolate chips into the dough before baking. Then, proceed with the chocolate topping as usual for an ultimate chocolatey treat. These snack recipes are always a hit!

Amazing Chocolate Hobnobs: 1 Simple Trick for Perfection
- Total Time: 45 minutes
- Yield: 20 cookies 1x
- Diet: Vegetarian
Description
Discover the joy of homemade Chocolate Hobnobs. These classic British oat biscuits offer a perfect blend of crispy edges and chewy centers, topped with a smooth layer of melted chocolate. Easy to make and incredibly satisfying, they are ideal for tea time, snacks, or as a delightful homemade gift.
Ingredients
- 225g unsalted butter, softened
- 150g light brown sugar
- 1 tablespoon golden syrup
- 1 teaspoon vanilla extract
- 150g rolled oats
- 120g all-purpose flour
- 1/2 teaspoon baking soda
- 1/4 teaspoon salt
- 200g milk or dark chocolate
- 1 tablespoon coconut oil (optional, for chocolate melt)
Instructions
- Cream the softened butter and light brown sugar in a mixing bowl until pale and fluffy.
- Mix in the golden syrup and vanilla extract until smooth.
- In a separate bowl, whisk together oats, flour, baking soda, and salt.
- Gradually stir the dry mix into the wet ingredients until a thick dough forms.
- Scoop tablespoon-sized portions, roll into balls, flatten slightly, and place on a parchment-lined baking sheet.
- Chill the cookie dough in the fridge for 20 minutes to reduce spreading.
- Preheat the oven to 175°C (350°F) and bake the cookies for 12–15 minutes until golden at the edges.
- Let cookies cool on the tray for 5 minutes before transferring to a rack.
- Melt the chocolate (and optional coconut oil) in a microwave or double boiler until smooth.
- Spread a spoonful of melted chocolate on each cooled cookie, let it set at room temperature or refrigerate.
Notes
- Toasting the oats before mixing adds an extra layer of nutty flavor.
- Let cookies cool completely before topping with chocolate to avoid melting mess.
- For a crunchier version, bake 2–3 minutes longer.
- If you can’t find golden syrup, light corn syrup or honey can be used, though the flavor will be slightly different.
- To make them vegan, swap butter for a plant-based alternative and use dairy-free chocolate.
- Avoid overbaking to prevent them from becoming too hard.
- Ensure chocolate is melted gently to avoid burning.
- Store in an airtight container once set to maintain freshness.
- Prep Time: 15 minutes
- Cook Time: 15 minutes
- Category: Dessert
- Method: Baking
- Cuisine: British
Nutrition
- Serving Size: 1 cookie
- Calories: 160 kcal
- Sugar: 9g
- Sodium: 60mg
- Fat: 9g
- Saturated Fat: 5g
- Unsaturated Fat: 3g
- Trans Fat: 0g
- Carbohydrates: 18g
- Fiber: 1g
- Protein: 2g
- Cholesterol: 20mg