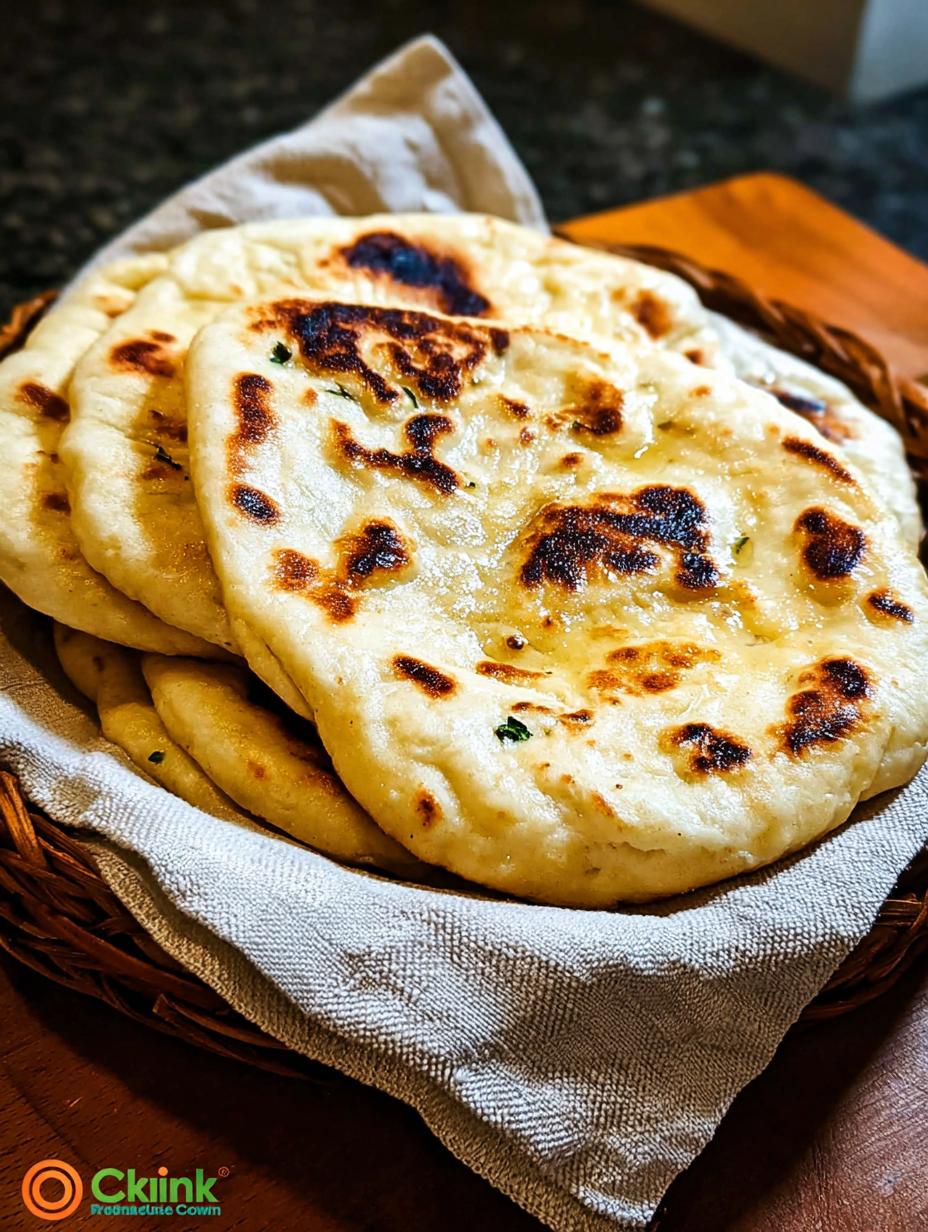
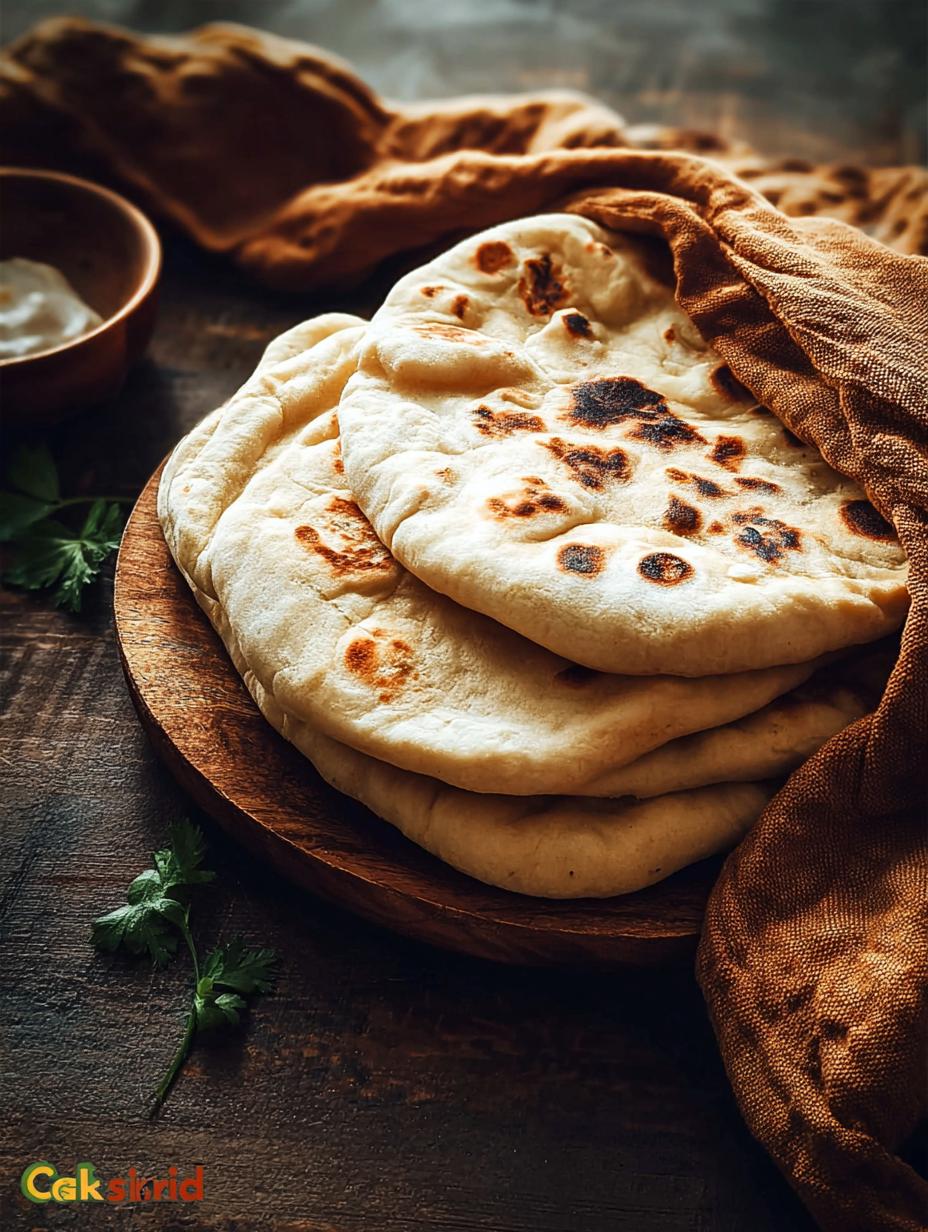
Pita Bread has been a staple in my kitchen ever since I first tried making it from scratch. My grandmother, who always had a knack for baking, used to tell me that there’s nothing quite like the smell of fresh, warm bread filling the house. I remember the first time I pulled a perfectly puffed pocket bread from the oven, its delicate steam carrying the earthy aroma of yeast and flour. That moment felt magical, and I’ve been hooked on making this easy homemade pita bread recipe ever since. The soft, chewy texture and the delightful pocket for fillings make it an absolute win for any meal. Let’s get cooking!
Why You’ll Love This Homemade Pita Bread
I genuinely believe this recipe will become your new favorite. Here’s why I just know you’ll fall in love with making your own:
- Incredible Taste: Nothing beats the fresh, warm flavor of homemade Pita Bread straight from your kitchen. It’s truly superior to anything you’ll buy pre-packaged.
- Quick & Easy: Despite its impressive appearance, this recipe is surprisingly simple, making it perfect even for beginner bakers.
- Healthier Choice: Making your own means you control the ingredients, avoiding unnecessary additives often found in store-bought versions.
- Budget-Friendly: With just a few basic pantry staples, you can create a batch of delicious flatbread for a fraction of the cost.
- Versatile & Fun: Perfect for dipping, wraps, or even making crunchy chips, this Mediterranean bread is incredibly adaptable to any meal.
- Family Favorite: Kids and adults alike will adore these soft, pillowy pockets, making mealtime an exciting experience.
Ingredients for Authentic Pita Bread
Gathering your ingredients is the first step to creating this wonderful flatbread. I always make sure I have these pantry staples on hand, as they’re essential for that perfect texture and taste.
- 1 ½ cups warm water – ideally around 105-115°F (40-46°C), this activates the yeast beautifully.
- 2 teaspoons sugar – just a touch to feed the yeast and help with browning. It’s crucial for a good rise.
- 2 ¼ teaspoons active dry yeast – this is the magic ingredient that gives our Pita Bread its characteristic puff and airy texture.
- 3 ½ cups all-purpose flour – I find this amount gives the best consistency for kneading and rolling.
- 1 ½ teaspoons salt – balances the flavors and strengthens the dough.
- 2 tablespoons olive oil – adds richness and helps keep the dough pliable, contributing to that soft, authentic Middle Eastern flatbread feel.
These simple ingredients come together to make a truly delightful homemade pita bread recipe easy enough for anyone to try!
How to Make Pita Bread at Home
Making your own Pita Bread is incredibly rewarding, and I promise, it’s easier than you think! Follow these steps closely, and you’ll have warm, fresh pocket bread in no time.
- Step 1: First, activate your yeast. In a medium bowl, combine 1 ½ cups warm water (around 110°F or 43°C is perfect), 2 teaspoons sugar, and 2 ¼ teaspoons active dry yeast. Give it a gentle stir, then let it sit for 5 to 10 minutes. You’ll know it’s ready when it gets foamy on top, indicating your yeast is alive and eager to work its magic for your homemade Pita Bread.
- Step 2: In a large mixing bowl, whisk together 3 ½ cups all-purpose flour and 1 ½ teaspoons salt. Create a well in the center, then pour in your activated yeast mixture and 2 tablespoons olive oil. Stir everything together with a wooden spoon or your hands until a shaggy, somewhat sticky dough forms.
- Step 3: Turn the dough out onto a lightly floured surface. Knead it enthusiastically for about 8 to 10 minutes. You’re looking for a smooth, elastic dough that springs back when you poke it. This kneading develops the gluten, which is essential for that signature puff in your Mediterranean bread.
- Step 4: Lightly oil a clean bowl, place the dough inside, and turn it once to coat. Cover the bowl with plastic wrap or a damp kitchen towel. Let it rise in a warm spot for 1 to 1.5 hours, or until it has visibly doubled in size. This first rise is crucial for flavor and texture.
- Step 5: Gently punch down the risen dough to release the air. Transfer it back to your lightly floured surface and divide it into 8 equal pieces. Take each piece and roll it into a neat ball, then use a rolling pin to flatten each ball into a 6 to 7-inch circle, about ⅛-inch thick. Don’t worry if they’re not perfectly round; rustic is charming!
- Step 6: Arrange the rolled-out dough circles on a clean kitchen towel and cover them with another towel. Let them rest for another 15 to 20 minutes. This short rest allows the gluten to relax, making it easier for the Pita Bread to puff up beautifully during cooking.
- Step 7: Heat a cast iron skillet or a heavy-bottomed frying pan over medium-high heat until it’s very hot (you should see a wisp of smoke). Place one dough circle in the hot, dry pan. Cook for 1 to 2 minutes, watching for bubbles to form on the surface. Flip it over and cook for another 1 to 2 minutes. The magic happens now: it should puff up like a balloon, creating that perfect internal pocket. If it doesn’t fully puff, don’t fret; it will still be delicious flatbread!
- Step 8: Once cooked, transfer the puffed Pita Bread to a clean kitchen towel and wrap it to keep it warm and soft. Repeat with the remaining dough, making sure your pan stays hot between each one. Serve your homemade Pita Bread warm and enjoy the fruits of your labor!
Pro Tips for the Best Pita Bread
I’ve learned a few tricks over the years that truly elevate homemade Pita Bread from good to absolutely incredible. These expert tips will help you achieve that perfect puff and tender texture every time, making your flatbread experience even more rewarding.
- Always ensure your water temperature is just right for activating the yeast; too hot will kill it, too cold won’t activate it.
- Don’t skimp on kneading time. Developing that gluten is key for elasticity and creating the beautiful pocket in your pocket bread.
- Make sure your skillet is scorching hot before adding the dough. High heat is essential for the rapid steam production that inflates the pita.
- Cover your cooked pitas with a clean towel immediately after removing them from the pan. This traps steam and keeps them wonderfully soft and pliable.
What’s the secret to perfect pocket bread?
The real secret lies in two things: strong gluten development from thorough kneading and a very hot cooking surface. The high heat instantly creates steam inside the dough, which then pushes the layers apart, forming that iconic pocket. This is crucial for truly authentic pocket bread.
Can I make Pita Bread ahead of time?
Absolutely! You can prepare the dough up to the end of the first rise, then cover it tightly and refrigerate for up to 24 hours. Just let it come to room temperature for about 30-60 minutes before shaping and cooking. This makes fresh Pita Bread on demand incredibly easy.
How do I avoid common mistakes with homemade pita bread?
Over-flouring during kneading or rolling can lead to dry, stiff Pita Bread, so use flour sparingly. Also, ensure your pan is hot enough; a lukewarm pan won’t generate the steam needed for puffing. Lastly, avoid over-mixing the dough in the initial stages, as this can make it tough.
Best Ways to Serve Pita Bread
Once you’ve made your fresh batch of Pita Bread, the culinary possibilities are endless! I love how versatile this flatbread is, making it a perfect addition to almost any meal. Here are some of my favorite ways to enjoy it:
- Dipping Delight: My absolute favorite way to serve Pita Bread is alongside a creamy, homemade hummus or a refreshing tzatziki. The soft texture is ideal for scooping up every last bit of dip.
- Delicious Wraps and Sandwiches: Forget ordinary bread! Fill your warm pocket bread with falafel, grilled chicken, fresh veggies, or even scrambled eggs for a quick and satisfying meal. It’s a fantastic option for a healthy, portable lunch.
- Pita Pizzas: For a super easy weeknight dinner, spread some tomato sauce on your Pita Bread, add your favorite toppings, and bake until bubbly. It’s a fun and customizable meal that everyone loves.
Whether you’re hosting a Mediterranean-themed dinner or just looking for a simple snack, fresh Pita Bread elevates any dish.

Nutrition Facts for Pita Bread
I always find it helpful to know what I’m eating, especially when it comes to delicious homemade treats like this Pita Bread. Here’s a breakdown of the nutritional content per serving (this recipe makes 8 servings), so you can enjoy your flatbread with peace of mind:
- Calories: 165 kcal
- Protein: 4.5g
- Fat: 2.5g
- Saturated Fat: 0.5g
- Carbohydrates: 32g
- Fiber: 1g
- Sugar: 0.5g
- Sodium: 210mg
Nutritional values are estimates and may vary based on specific ingredients and brands used, but this gives you a good idea of this healthy Pita Bread option.
How to Store and Reheat Pita Bread
Once you’ve gone to the effort of making delicious homemade Pita Bread, you’ll want to make sure it stays fresh and ready for your next meal. Proper storage is key to maintaining its soft texture and flavor. I always let my pitas cool completely on a wire rack before storing them; this prevents any condensation that could make them soggy.
For short-term storage, place the cooled flatbread in an airtight container or a resealable plastic bag. They’ll keep beautifully at room temperature for 2-3 days, though I find they’re best enjoyed within the first day or two. If you need them to last a bit longer, you can refrigerate them for up to 3-4 days.
For longer storage, Pita Bread freezes exceptionally well! Stack cooled pitas with a small piece of parchment paper between each, then wrap the stack tightly in plastic wrap, followed by aluminum foil. They can be frozen for up to 3 months. When you’re ready to enjoy them, simply thaw them at room temperature or warm them directly from frozen.
To reheat, I usually opt for a quick warm-up in a dry skillet over medium heat for about 30 seconds per side, or wrap them in foil and pop them in a 300°F (150°C) oven for 5-7 minutes. This brings back that lovely soft texture, making your stored Pita Bread taste almost as fresh as when it first came off the pan.
Frequently Asked Questions About Pita Bread
Can I use whole wheat flour for this Pita Bread recipe?
Yes, absolutely! I often make whole wheat pita bread for a healthier option. You can substitute up to half of the all-purpose flour with whole wheat flour. Just be aware that the dough might be a little less pliable and the texture slightly denser, but it will still be delicious and full of fiber. You might also need a tiny bit more water, as whole wheat absorbs more liquid.
Why isn’t my Pita Bread puffing up?
There are a few common reasons why your Pita Bread might not be puffing. The most frequent culprit is not having your skillet hot enough; the high heat is crucial for creating that steam pocket. Another reason could be that your dough wasn’t kneaded enough, so the gluten didn’t develop sufficiently, or it was rolled too thick. Ensuring your yeast is active and the dough has rested properly for the second time also helps guarantee that perfect pocket bread effect.
What is the difference between Pita Bread and naan?
While both are delicious flatbreads, Pita Bread vs naan have distinct differences. Pita is typically made with simpler ingredients, cooked quickly at high heat, often resulting in a hollow pocket. Naan, on the other hand, usually includes yogurt, milk, or eggs, giving it a richer, softer, and chewier texture, and is traditionally cooked in a tandoor oven. Naan also rarely has that distinct pocket.
Is Pita Bread good for you?
Generally, yes, Pita Bread can be a healthy choice, especially when compared to some other bread options. This homemade version uses simple ingredients and no unhealthy additives. Opting for whole wheat pita bread further boosts its nutritional value with more fiber. It’s a great vehicle for healthy fillings like hummus and vegetables, making it a good part of a balanced diet.
Variations of Pita Bread You Can Try
Once you’ve mastered the basic Pita Bread recipe, don’t hesitate to get creative! I love experimenting with different variations to suit various meals or dietary needs. It’s amazing how a few tweaks can transform this humble flatbread into something new and exciting.
- Whole Wheat Pita: For a heartier, more fibrous option, substitute 1 to 1.5 cups of the all-purpose flour with whole wheat flour. This creates a delicious and healthy whole wheat pita bread that’s perfect for a wholesome meal.
- Herb-Infused Pita: Before rolling out the dough, knead in 1-2 tablespoons of finely chopped fresh herbs like rosemary, thyme, or oregano. This adds a wonderful aromatic flavor to your Mediterranean bread.
- Garlic & Cheese Pita: After rolling, sprinkle a little garlic powder and grated Parmesan cheese on one side before cooking. This makes a savory, irresistible pocket bread that’s fantastic on its own or with soup.
- Oven-Baked Pita: If you prefer baking, preheat your oven with a pizza stone or baking steel to 475°F (245°C). Bake the rolled dough for 2-3 minutes per side. This method often yields a more consistent puff for your Pita Bread.

Pita Bread: Get 1 Magical Puff Every Time
- Total Time: 1 hour 50 minutes
- Yield: 8 pitas 1x
- Diet: Vegetarian
Description
Soft, warm, and beautifully puffed, this Homemade Pita Bread recipe is your go-to for a delicious, fresh-baked flatbread that’s better than store-bought. Perfect for wraps, dipping in hummus or tzatziki, or turning into crunchy pita chips, it’s a simple, quick bread made with pantry ingredients. Whether you’re looking for a quick breakfast idea, easy dinner bread, or a healthy snack, this easy recipe will have you coming back for more!
Ingredients
- 1 ½ cups warm water
- 2 teaspoons sugar
- 2 ¼ teaspoons active dry yeast
- 3 ½ cups all-purpose flour
- 1 ½ teaspoons salt
- 2 tablespoons olive oil
Instructions
- In a bowl, combine warm water (about 110°F), sugar, and active dry yeast. Let it sit for 5–10 minutes until foamy. This step ensures your yeast is alive and ready to work for your homemade pita.
- In a large mixing bowl, mix the flour and salt. Add the yeast mixture and olive oil. Stir until a shaggy dough forms. This is the start of your delicious flatbread.
- Knead the dough on a lightly floured surface for about 8–10 minutes until it becomes smooth and elastic. You can also use a stand mixer with a dough hook for this traditional pita bread step.
- Transfer the dough to a lightly oiled bowl, cover it with a damp cloth or plastic wrap, and let it rise in a warm place for 1 to 1.5 hours or until doubled in size. This first rise is crucial for the pocket bread.
- Once risen, punch down the dough and divide it into 8 equal pieces. Shape each piece into a ball, then roll each into a 6–7 inch circle on a lightly floured surface. These will become your individual pita bread.
- Let the rolled-out dough rest, covered with a towel, for about 15–20 minutes. This second rest helps with puffing during cooking and makes for perfect Mediterranean bread.
- Heat a cast iron skillet or heavy-bottomed pan over medium-high heat. Place one pita on the hot skillet and cook for 1–2 minutes until bubbles form. Flip and cook for another 1–2 minutes. The pita should puff up, creating that characteristic pocket. Repeat with the remaining dough for more homemade pita bread.
- Place the cooked pitas in a clean kitchen towel to trap steam and keep them soft. Serve warm or at room temperature. Enjoy your authentic pita bread!
Notes
- Let the dough rest after rolling to encourage the perfect puff in your homemade pita bread.
- Make sure your skillet is hot before cooking each pita; this is key for the pocket bread effect.
- If the pita doesn’t puff, it’s still soft and delicious for wraps or dips, making it a versatile flatbread.
- You can bake these in the oven instead: Bake on a preheated pizza stone or baking steel at 475°F for 2–3 minutes for a different method of baking pita bread.
- To reheat leftover pita, warm it on a skillet or wrap in foil and heat in a 300°F oven for 5–7 minutes.
- You can refrigerate the dough after the first rise; let it come to room temperature before shaping for easy pita bread prep.
- Prep Time: 1 hour 30 minutes
- Cook Time: 20 minutes
- Category: Bread
- Method: Stovetop
- Cuisine: Middle Eastern
Nutrition
- Serving Size: 1 pita
- Calories: 165 kcal
- Sugar: 0.5g
- Sodium: 210mg
- Fat: 2.5g
- Saturated Fat: 0.5g
- Unsaturated Fat: 2g
- Trans Fat: 0g
- Carbohydrates: 32g
- Fiber: 1g
- Protein: 4.5g
- Cholesterol: 0mg