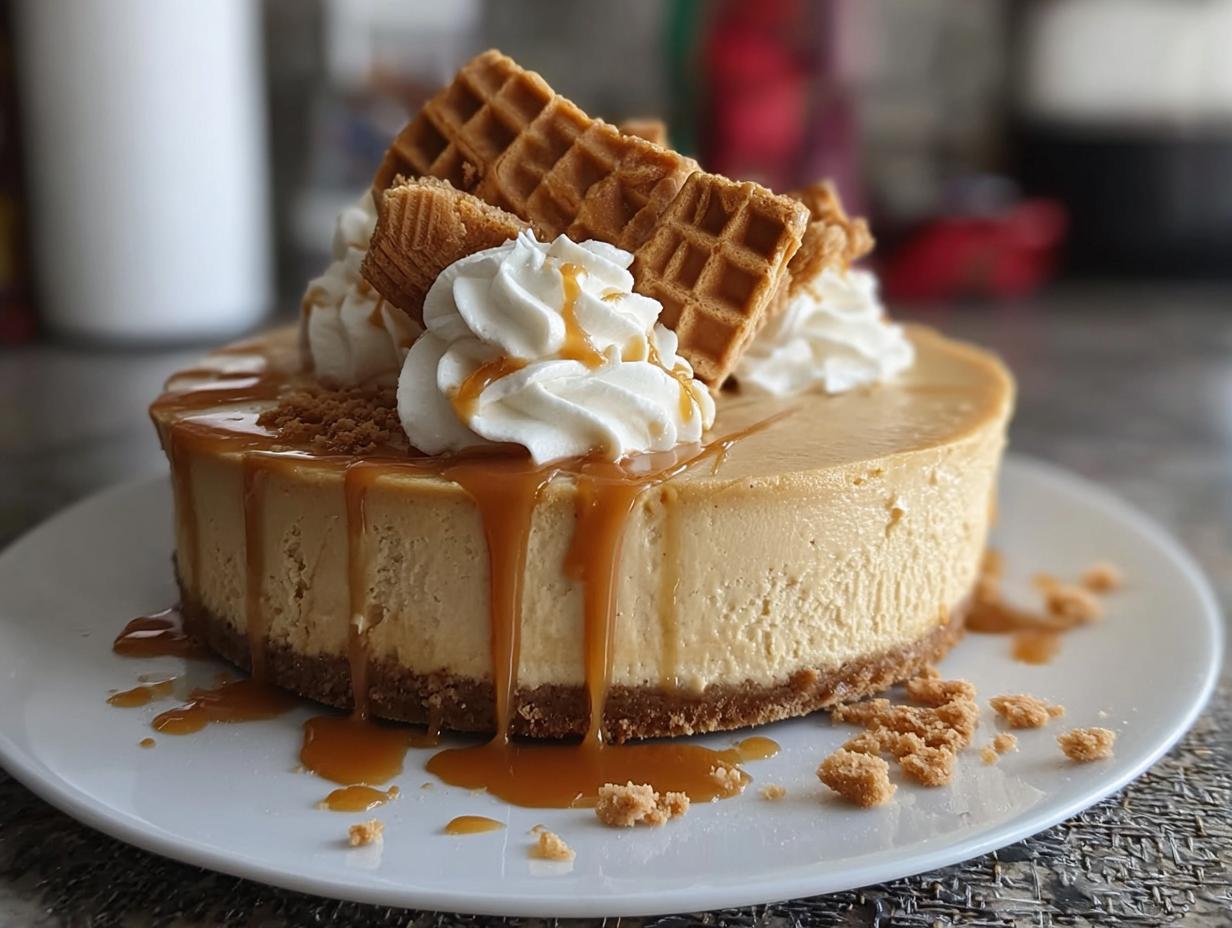
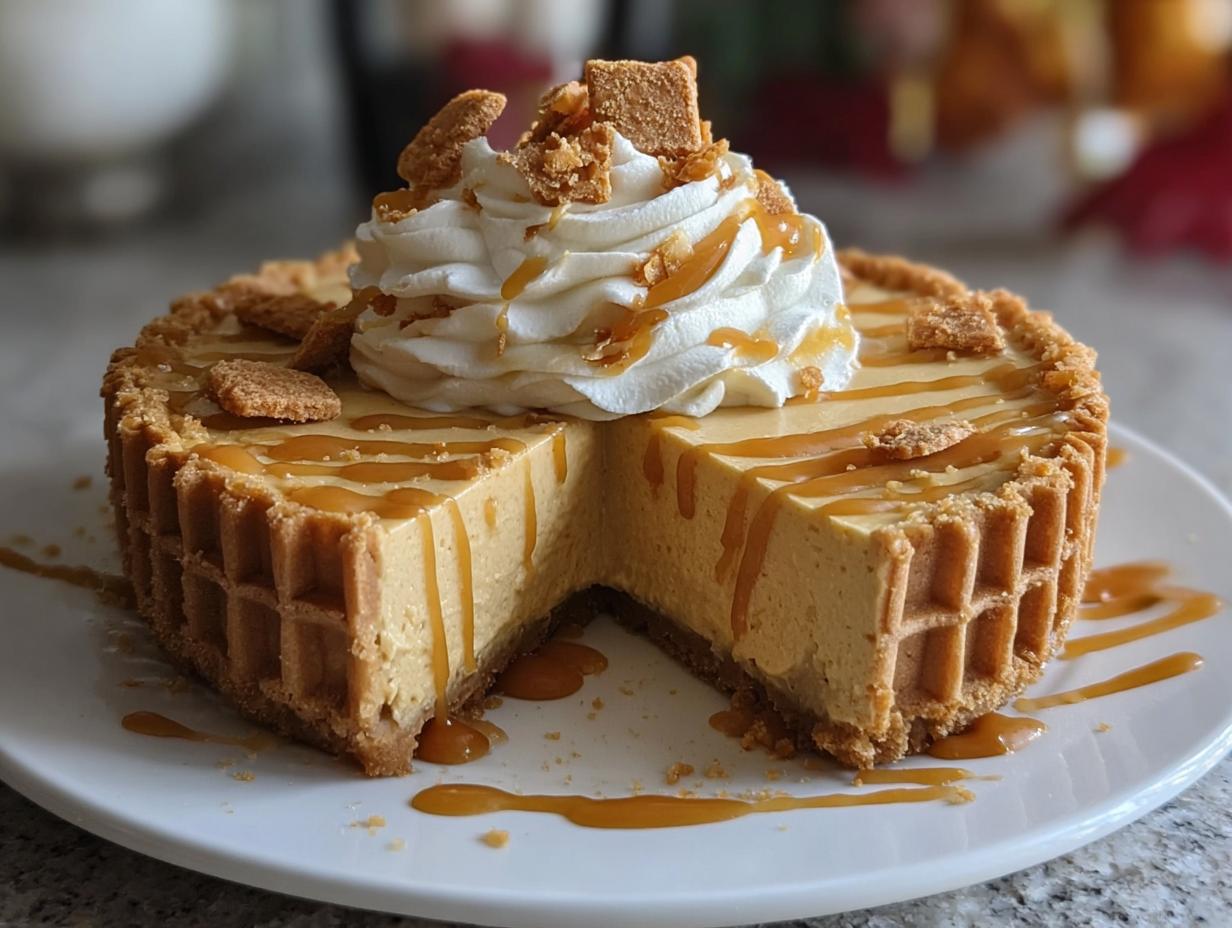
Harry Potter Waffle Cone cheesecake has become my absolute favorite way to bring a little magic into my kitchen, especially when I want a showstopper dessert. I remember the first time I tried recreating the iconic Butterbeer flavors in a cheesecake form, and I knew I had to pair it with a homemade waffle cone crust. The smell of the sweet, buttery waffle cone baking is pure enchantment! This unique dessert, a true Harry Potter dessert cone, captures that magical essence perfectly. If you’re looking for an easy Harry Potter waffle cone recipe that will wow your guests, you’ve found it. Let’s get cooking!
Why You’ll Love This Harry Potter Waffle Cone
- An explosion of Butterbeer flavor that transports you straight to the Wizarding World.
- Surprisingly quick prep time, making it perfect for weeknight magic.
- A healthier spin with a homemade waffle cone crust, allowing control over ingredients.
- Budget-friendly ingredients that create an impressive, magical dessert experience.
- Family-friendly fun that kids and adults alike will adore making and eating.
- This Harry Potter dessert cone is a unique treat that tastes as good as it looks.
- It’s a delightful way to experience the best Harry Potter waffle cone ideas.
- A truly memorable Harry Potter dessert cone for any fan!
Ingredients for Harry Potter Waffle Cone
Creating this magical treat is easier than you think! Here’s what you’ll need to assemble your very own Wizarding World waffle cone masterpiece:
- 2 cups waffle cone crumbs – these form the base of our crust and give it that signature taste. You can crush store-bought waffle cones or even use leftover homemade ones.
- ½ cup unsalted butter, melted – this binds the crumbs together, ensuring a firm crust.
- ¼ cup sugar – just a touch of sweetness to complement the waffle cone flavor.
- 16 oz cream cheese, softened – this is the heart of our creamy cheesecake filling, providing that rich, smooth texture. Make sure it’s at room temperature for easy blending.
- 1 cup caramel sauce – for that authentic Butterbeer flavor!
- 1 can (14 oz) sweetened condensed milk – this adds sweetness and helps create that wonderfully dense cheesecake consistency.
- 1 tsp vanilla extract – a classic flavor enhancer that rounds out the taste.
- 1 cup heavy whipping cream – whipped to perfection, this makes the filling light and airy.
- Whipped cream – for topping!
- Additional caramel sauce – because you can never have too much caramel.
- Optional: Crushed waffle cones for extra texture – a little crunch on top is always a good idea.
How to Make Harry Potter Waffle Cone
Let’s get baking and create this magical dessert! This homemade Harry Potter waffle cone recipe is simpler than you might think.
- Step 1: First things first, preheat your oven to 350°F (175°C). Grab a 9-inch springform pan and get ready to build our delightful crust.
- Step 2: In a mixing bowl, combine the waffle cone crumbs, melted butter, and sugar. I like to give it a good stir until it all smells wonderfully sweet and buttery.
- Step 3: Press this crumb mixture evenly into the bottom of your prepared springform pan. You want a nice, compact layer for the base of your cheesecake.
- Step 4: Bake the crust for about 10 minutes, just until it’s lightly golden and fragrant. This pre-baking step helps set the crust nicely.
- Step 5: While that’s baking, let’s make the filling! Beat your softened cream cheese until it’s wonderfully smooth and creamy.
- Step 6: Gradually add the caramel sauce, sweetened condensed milk, and vanilla extract. Keep mixing until everything is perfectly combined and smells like Butterbeer!
- Step 7: In a separate bowl, whip the heavy cream until you achieve stiff peaks. This makes the filling so light and airy.
- Step 8: Gently fold the whipped cream into the cream cheese mixture. Be careful not to overmix; we want to keep that lovely fluffiness. This is where your homemade Harry Potter waffle cone really starts to take shape.
- Step 9: Pour the luscious cheesecake filling over the cooled waffle cone crust. Smooth the top with a spatula so it’s perfectly even.
- Step 10: Cover the springform pan with plastic wrap and chill it in the refrigerator for at least 4 hours, or even better, overnight. This allows the flavors to meld and the cheesecake to set beautifully.
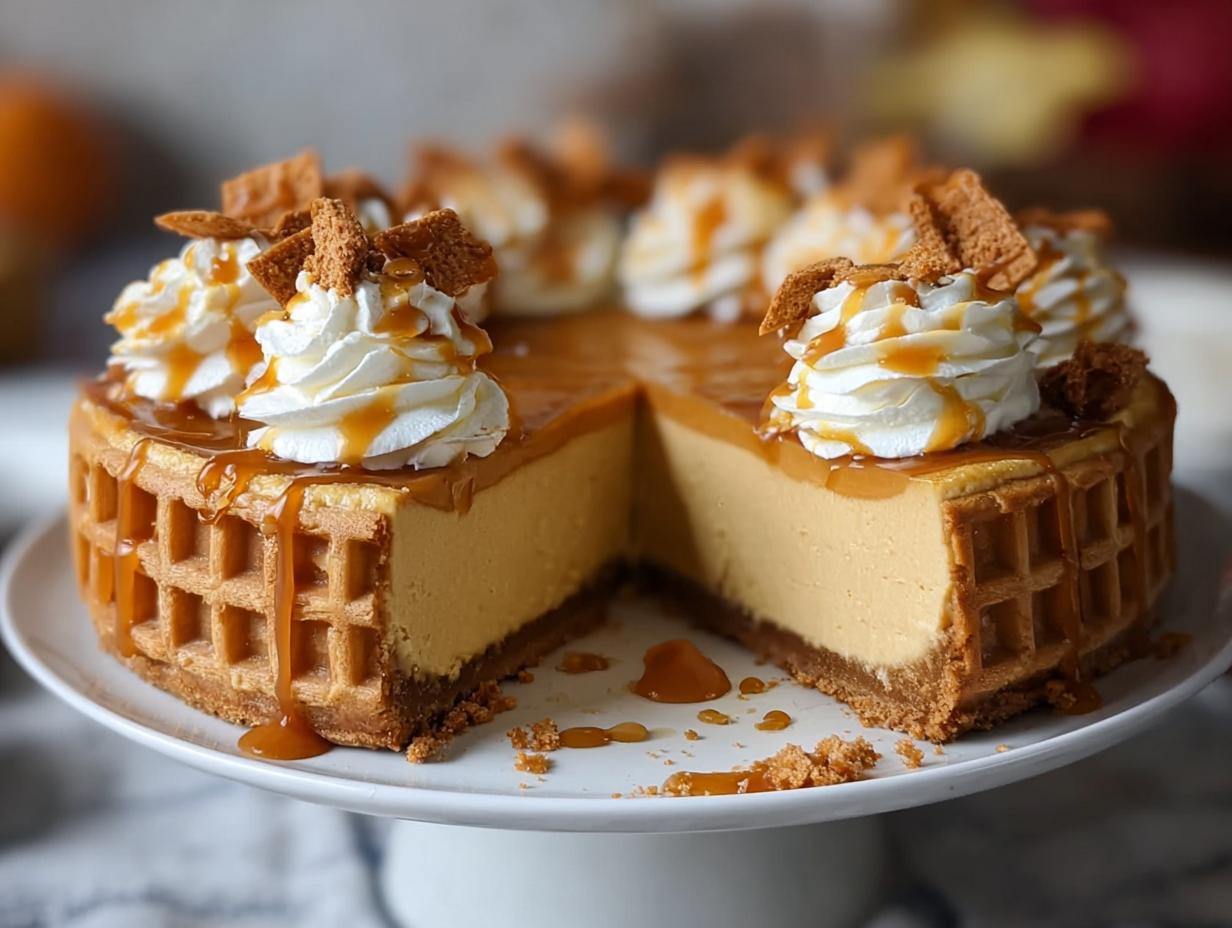
- Step 11: Once chilled and firm, carefully remove the sides of the springform pan. Top with whipped cream and extra caramel sauce, and maybe some crushed waffle cones for that extra crunch. Enjoy your incredible homemade Harry Potter waffle cone!
Pro Tips for the Best Harry Potter Waffle Cone
I’ve learned a few tricks over the years to make this dessert truly magical. Follow these tips for a dessert that’s simply spellbinding!
- Use fresh, good-quality waffle cones for crushing. The flavor of the cone really shines through.
- For an extra buttery crust, feel free to add a tablespoon of brown sugar along with the white sugar.
- Ensure your cream cheese is truly softened; this is key to a smooth, lump-free filling.
- Don’t overmix the filling once you add the whipped cream; gentle folding preserves the airy texture.
What’s the secret to perfect Harry Potter waffle cone crust?
The real secret to a perfect DIY Harry Potter waffle cone crust is the ratio of crumbs to butter and sugar. A good, firm press into the pan also helps it hold its shape beautifully after baking. For more baking tips, check out this guide on dessert making.
Can I make Harry Potter waffle cone cheesecake ahead of time?
Absolutely! This Harry Potter waffle cone cheesecake is actually best made a day in advance. It allows the flavors to meld and the cheesecake to set perfectly. Just cover it tightly before refrigerating.
How do I avoid common mistakes with Harry Potter dessert cones?
A common pitfall is not softening the cream cheese enough, leading to a lumpy filling. Also, avoid overbaking the crust; it just needs a light golden hue. Lastly, be patient with chilling time; it’s crucial for the perfect set! Learn more about proper chilling techniques for cheesecake.
Best Ways to Serve Harry Potter Waffle Cone
Presenting this magical dessert is almost as fun as eating it! For a truly enchanting experience, I love serving slices of this Harry Potter waffle cone cheesecake on dark, enchanted-looking plates. Complement its rich, creamy texture with a side of fresh berries, like raspberries or blueberries, which add a lovely tartness. And of course, no magical feast is complete without a beverage to match! Pair it with a homemade Butterbeer flavored waffle cone drink or a chilled glass of milk for the ultimate Wizarding World treat. It’s a simple yet elegant way to enjoy your Harry Potter themed ice cream cone. For other dessert ideas, consider these Halloween chocolate chip cookies.
Nutrition Facts for Harry Potter Waffle Cone
Here’s a look at the nutritional breakdown for one slice of this magical Harry Potter waffle cone cheesecake. It’s a decadent treat designed to bring a little bit of the Wizarding World to your table.
- Calories: 450 Kcal
- Fat: 30g
- Saturated Fat: 18g
- Protein: 6g
- Carbohydrates: 40g
- Fiber: 1g
- Sugar: 30g
- Sodium: 200mg
Nutritional values are estimates and may vary based on specific ingredients used.
How to Store and Reheat Harry Potter Waffle Cone
Once your magical Harry Potter waffle cone cheesecake has cooled completely, it’s time to think about storing any leftovers. I always make sure it’s fully chilled before I even think about covering it. The best way to keep this delicious Harry Potter dessert cone fresh is to cover it tightly with plastic wrap, ensuring no air can get in. This keeps it perfect in the refrigerator for about 3 to 4 days. If you want to save some for a future magical craving, you can freeze it! Wrap individual slices tightly in plastic wrap, then add a layer of foil or place them in an airtight container. It will keep beautifully in the freezer for up to 3 months. When you’re ready to enjoy it again, thaw the slices overnight in the fridge. For a quick reheat, you can gently warm a slice in the microwave for about 15-20 seconds, just enough to take the chill off and bring back that creamy texture. You might also enjoy these protein waffles for a different breakfast treat.
Frequently Asked Questions About Harry Potter Waffle Cone
Can I use store-bought waffle cones for the crust?
Yes, absolutely! Using store-bought waffle cones is a fantastic shortcut for this Harry Potter waffle cone recipe. Just crush them into fine crumbs, and they work just as well as homemade for creating that delicious base for your cheesecake.
How do I make Harry Potter waffle cones from scratch if I don’t have a cone maker?
While this recipe uses crushed waffle cones for the crust, if you’re feeling adventurous and want to make actual cones, you’ll need a waffle cone maker or a pizzelle press. The batter is simple: typically flour, sugar, butter, and milk. You’d cook thin layers until golden and quickly shape them while warm. It’s a fun DIY Harry Potter waffle cone project! For more baking inspiration, consider trying British scones.
What are the best Harry Potter themed ice cream cone pairings?
For this cheesecake, the Butterbeer flavors are already built-in! However, if you were making actual cones for ice cream, think classic vanilla, chocolate, or even a caramel swirl ice cream to complement the Butterbeer theme. You could also try a “sorting hat” swirl of different colored ice creams!
Can I make Harry Potter dessert cones ahead of time?
This specific cheesecake recipe is designed to be made ahead of time for the best texture and flavor. The crust and filling need time to set in the refrigerator. Once assembled, it can be stored for several days, making it an excellent dessert for parties or gatherings.
Variations of Harry Potter Waffle Cone You Can Try
Once you’ve mastered the classic Harry Potter waffle cone cheesecake, why not get creative? There are so many fun ways to adapt this recipe to suit your taste or dietary needs. For a lighter option, consider making individual mini cheesecakes in muffin tins with a similar waffle cone crust. If you’re hosting a special event, transforming this into a Harry Potter sweet cone with colorful toppings and edible glitter can be a huge hit. For those looking for a gluten-free approach, simply use gluten-free waffle cones for the crust. You could even experiment with different flavors for the filling, perhaps adding a hint of cinnamon or nutmeg for a cozy twist, making each Harry Potter sweet cone uniquely yours. You might also enjoy this lemon zucchini bread for a different kind of baked treat.
Print
Magical Harry Potter Waffle Cone Delight
- Total Time: 4 hours 40 minutes
- Yield: 8 servings 1x
- Diet: Vegetarian
Description
Indulge in a magical Harry Potter Butterbeer Cheesecake with a unique waffle cone crust. This dessert combines creamy cheesecake with the sweet, buttery flavors of Butterbeer, topped with caramel and whipped cream.
Ingredients
- For the Waffle Cone Crust: 2 cups waffle cone crumbs
- ½ cup unsalted butter, melted
- ¼ cup sugar
- For the Cheesecake Filling: 16 oz cream cheese, softened
- 1 cup caramel sauce
- 1 can (14 oz) sweetened condensed milk
- 1 tsp vanilla extract
- 1 cup heavy whipping cream
- For Topping: Whipped cream
- Additional caramel sauce
- Optional: Crushed waffle cones for extra texture
Instructions
- Preheat your oven to 350°F (175°C).
- In a mixing bowl, combine the waffle cone crumbs, melted butter, and sugar. Mix until well combined.
- Press the mixture evenly into the bottom of a 9-inch springform pan.
- Bake the crust for about 10 minutes.
- While the crust cools, beat the cream cheese until smooth in a large mixing bowl.
- Gradually add the caramel sauce, sweetened condensed milk, and vanilla extract, mixing until fully combined.
- In a separate bowl, whip the heavy cream until stiff peaks form.
- Gently fold the whipped cream into the cheesecake mixture.
- Pour the cheesecake filling into the cooled waffle cone crust and smooth the top.
- Cover the springform pan with plastic wrap and chill in the refrigerator for at least 4 hours or overnight.
- Serve topped with whipped cream and additional caramel sauce. Add crushed waffle cones for extra texture if desired.
Notes
- Store leftovers covered in the refrigerator for up to 5 days.
- Can be frozen for longer storage; wrap tightly in plastic wrap and place in an airtight container.
- For a gluten-free version, use gluten-free waffle cones.
- Mascarpone cheese can be substituted for cream cheese.
- Prep Time: 30 minutes
- Cook Time: 10 minutes
- Category: Dessert
- Method: Baking
- Cuisine: American
Nutrition
- Serving Size: 1 slice
- Calories: 450 Kcal
- Sugar: 30g
- Sodium: 200mg
- Fat: 30g
- Saturated Fat: 18g
- Unsaturated Fat: 8g
- Trans Fat: 0g
- Carbohydrates: 40g
- Fiber: 1g
- Protein: 6g
- Cholesterol: 70mg