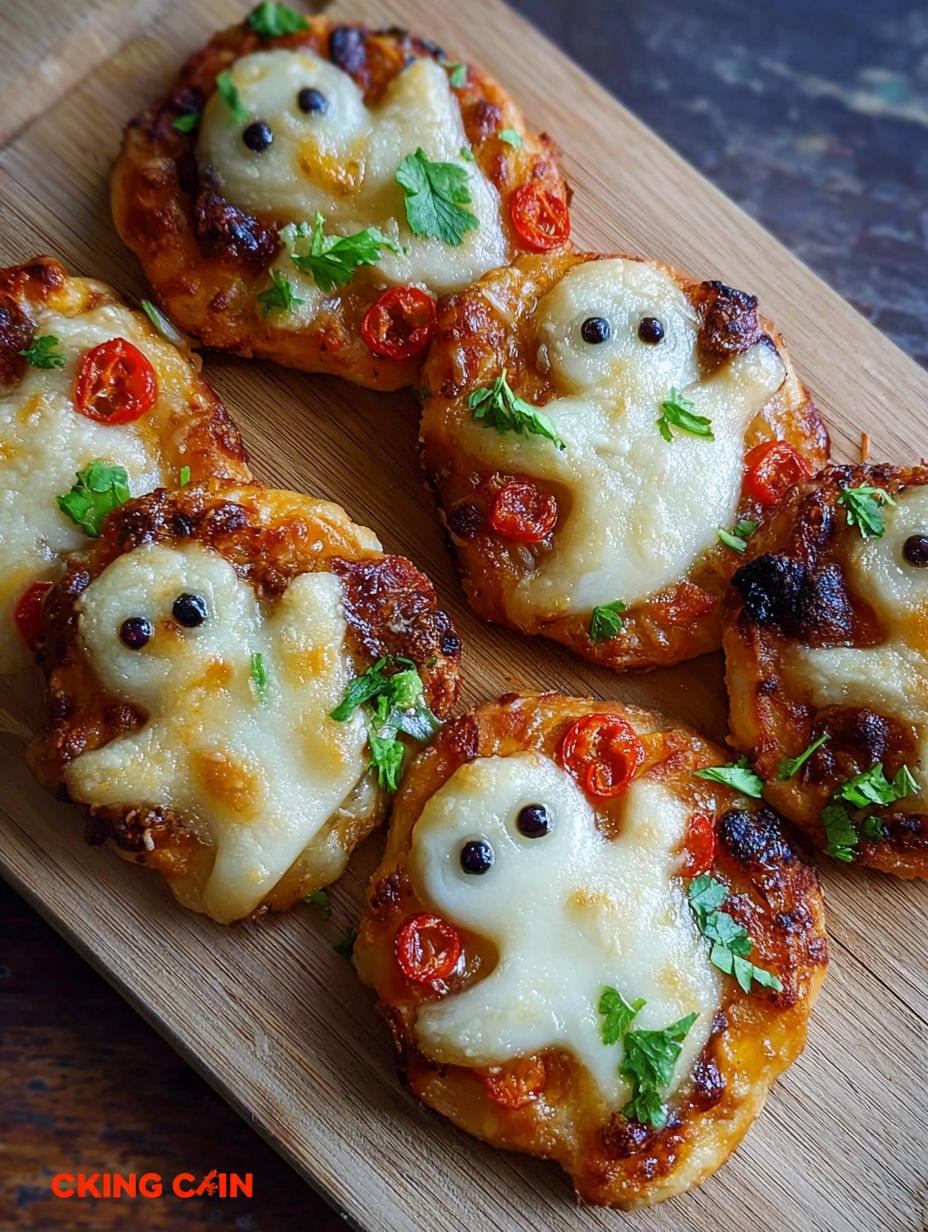
Adorable Mini Ghost Pizzas has become a staple in my home every October. I still remember the first time I made these; my kids shrieked with delight when they saw the little mozzarella ghosts peering up from their cheesy bodies. The smell of warm pizza dough and bubbling cheese always fills my kitchen with such a cozy, festive aroma, making them the perfect Halloween snacks for a spooky movie night. These easy ghost-shaped pizzas are not just fun to look at, but incredibly delicious and surprisingly simple to whip up for any party or just a fun weeknight treat. Let’s get cooking!
Why You’ll Love These Adorable Mini Ghost Pizzas
I know you’re going to adore these cute and tasty treats just as much as my family does. Here’s why these Adorable Mini Ghost Pizzas are a must-make this Halloween:
- They’re incredibly fun and festive, instantly bringing a smile to everyone’s face.
- The prep time is minimal, making them perfect for busy weeknights or last-minute party contributions.
- They’re a delightful twist on a classic, offering all the yummy flavors of pizza in a spooky, bite-sized form.
- These mini ghost pizzas are super customizable; you can easily add your favorite toppings under the cheese.
- They’re a budget-friendly option for feeding a crowd, especially for Halloween gatherings.
- These spooky pizza snacks are a fantastic way to get kids involved in the kitchen.
- They make for a surprisingly wholesome snack compared to many other Halloween treats.
- Everyone loves a good spooky pizza, and these deliver on both creativity and taste!
Ingredients for Adorable Mini Ghost Pizzas
Gathering your ingredients is the first step to creating these delightful Adorable Mini Ghost Pizzas. I’ve found that using quality components makes all the difference for a truly delicious ghost pizza.
- 1 can (13.8 oz) refrigerated pizza dough – this is your quick and easy base; look for a reputable brand.
- ½ cup pizza sauce – your favorite brand works best, just make sure it’s not too watery.
- 8 oz mozzarella cheese block or slices – I prefer a block as it allows for cleaner ghost shapes when cutting.
- 8 to 10 black olives – these become the spooky eyes for your mini ghost pizzas.
- 1 tablespoon olive oil – great for brushing the crust for a golden finish.
- All-purpose flour for dusting – just a little bit to prevent sticking while you work with the dough.
These simple ingredients come together to make a fun and flavorful ghost pizza that everyone will enjoy. Trust me, you’ll want to have everything ready before you start shaping your little ghosts!
How to Make Adorable Mini Ghost Pizzas
Making these Adorable Mini Ghost Pizzas is a super fun and straightforward process, perfect for a Halloween kids recipe activity. I love how quickly these come together, leaving more time for spooky celebrations!
- Step 1: First, preheat your oven to 400°F (200°C). While it’s warming up, lightly dust a clean surface with all-purpose flour. Carefully unroll the refrigerated pizza dough and roll it out to about ¼-inch thickness. This creates a sturdy, yet tender, base for your mini pizzas.
- Step 2: Using a round cookie cutter (about 3 inches in diameter) or a regular drinking glass, cut out mini pizza bases from the dough. I usually get about 10-12 circles from one can of dough. Transfer these dough circles to a parchment-lined baking sheet, leaving a little space between each one for them to puff up.
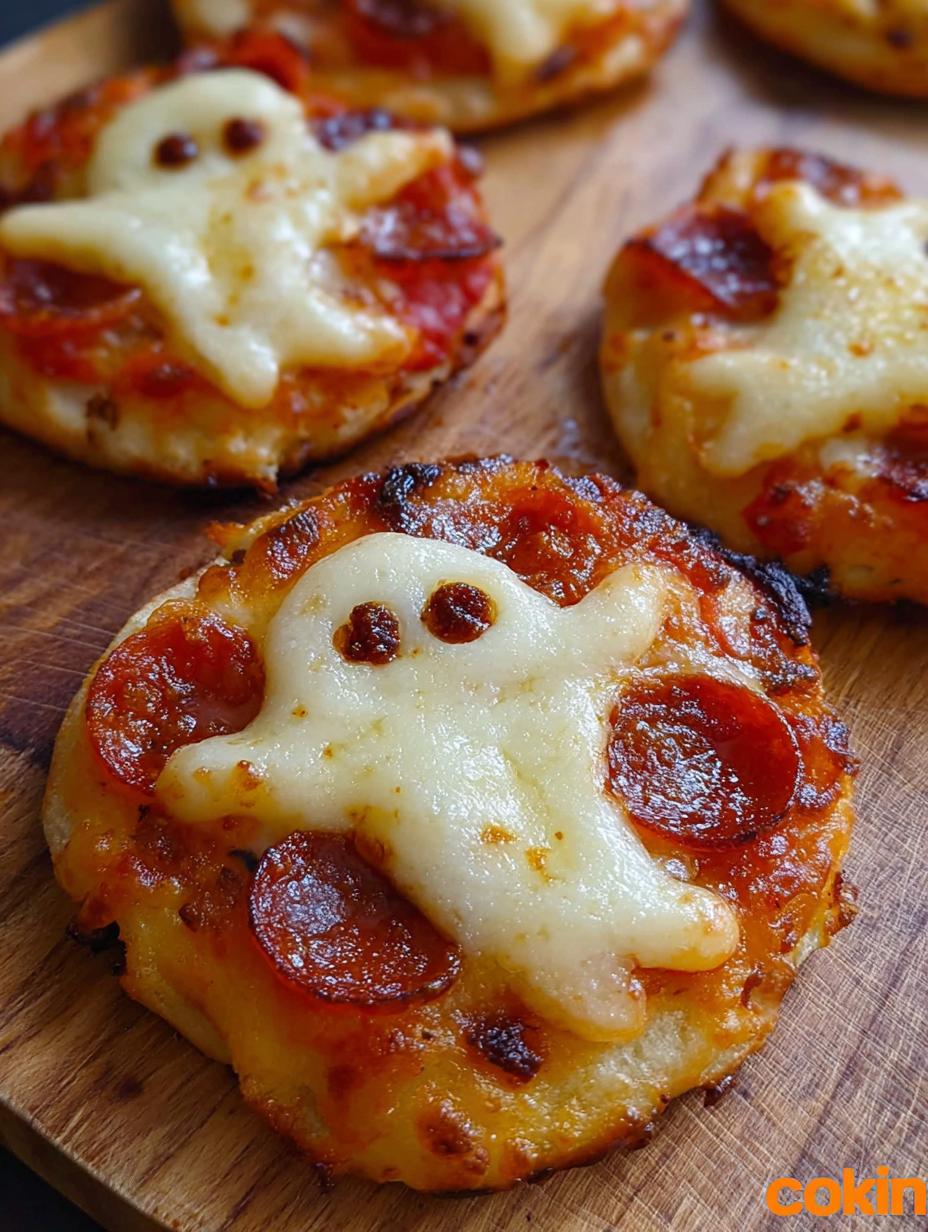
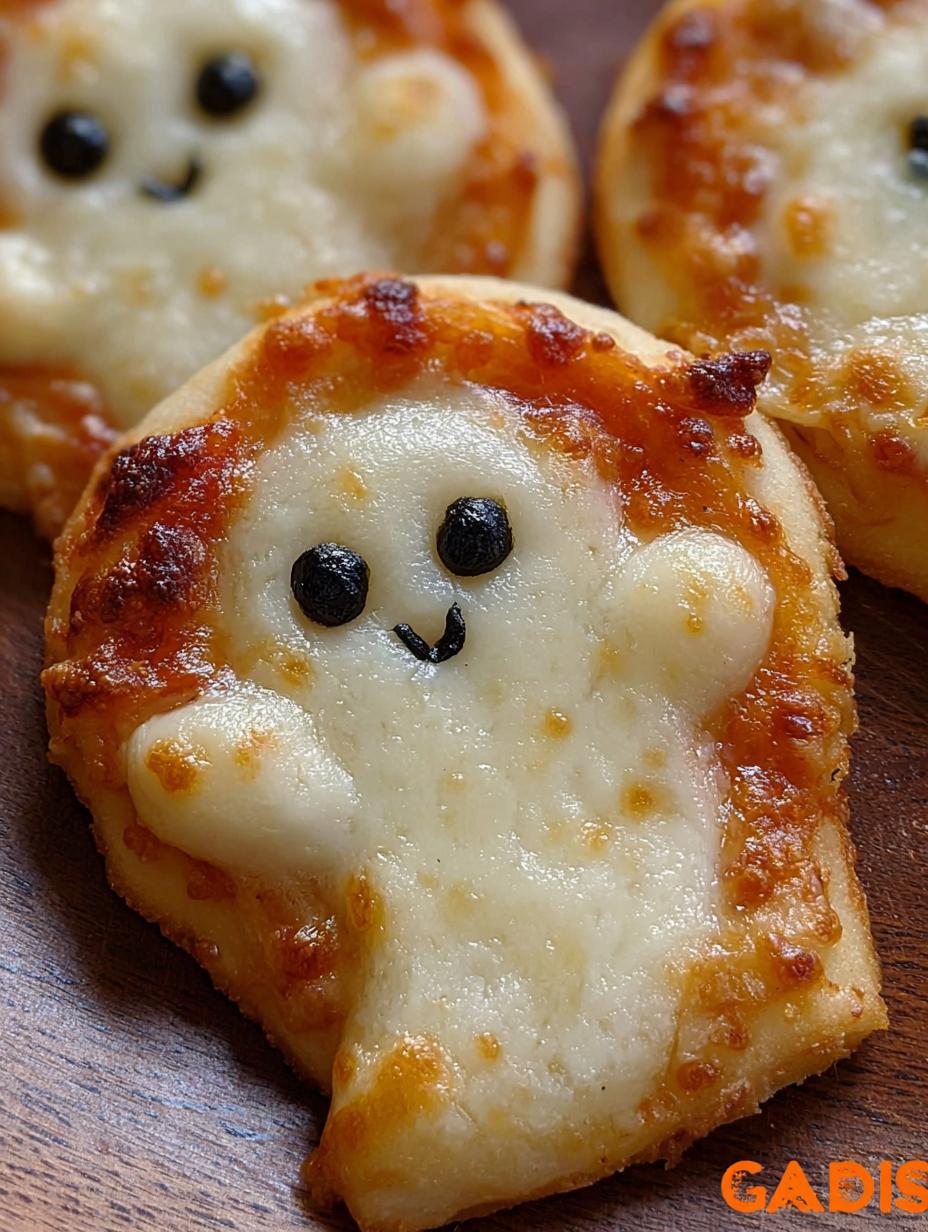
- Step 3: Now for the fun part: the ghosts! Slice your mozzarella cheese into roughly ¼-inch thick pieces. Grab a small ghost-shaped cookie cutter, or if you don’t have one, a sharp knife works perfectly to cut out little ghost figures from the cheese. Set these aside. For the eyes, slice your black olives in half lengthwise, then cut them into small oval shapes. This meticulous step makes for truly Adorable Mini Ghost Pizzas.
- Step 4: Spread a thin layer of pizza sauce onto each dough circle. I find a small spoon works best for this. Be careful not to use too much, as this can make the mini pizzas soggy. Just enough to cover the center, leaving a small border around the edge, is ideal.
- Step 5: Gently place one mozzarella ghost onto the center of each sauced mini pizza. Then, add two olive “eyes” to each ghost, pressing them lightly into the cheese so they stick. This is where the magic happens, transforming simple ingredients into a festive Halloween kids recipe.
- Step 6: If you’re like me and love a golden, slightly crispy crust, lightly brush the exposed dough edges with olive oil. This adds a lovely sheen and helps achieve that perfect texture.
- Step 7: Bake the mini pizzas in your preheated oven for 10–12 minutes. Keep an eye on them; you want the cheese to be perfectly melted and just slightly golden, and the dough puffed and lightly browned at the edges. The aroma filling your kitchen will be incredible!
- Step 8: Once baked, let these delightful Adorable Mini Ghost Pizzas cool for 3–5 minutes on the baking sheet before serving. This allows the cheese to set properly and prevents any accidental burns, especially for little hands eager to grab them.
Pro Tips for the Best Adorable Mini Ghost Pizzas
I’ve made these Adorable Mini Ghost Pizzas countless times, and I’ve picked up a few tricks along the way that guarantee success every single time. Follow these expert tips for the most charming and delicious results.
- Always use low-moisture mozzarella, either block or pre-sliced. Fresh mozzarella releases too much water, which can make your ghost shapes melt into a messy puddle.
- Don’t over-sauce! A thin layer is all you need. Too much sauce will make your pizza soggy and can cause the cheese ghosts to slide off.
- Make sure your ghost cookie cutter (or knife-cut ghosts) fits well within the dough circle. If the cheese is too large, it will melt over the edges and lose its distinct ghost shape.
- For extra flavor, consider adding a pinch of garlic powder or Italian seasoning to your pizza sauce before spreading it.
What’s the secret to perfect ghost shapes?
The real secret to perfectly shaped ghost cheese on your mini ghost pizzas lies in two things: using low-moisture mozzarella and giving your cheese ghosts a quick chill. After cutting the shapes, pop them in the freezer for 5-10 minutes before placing them on the pizzas. This helps them hold their form during the initial bake.
Can I make Adorable Mini Ghost Pizzas ahead of time?
Absolutely! You can assemble the Adorable Mini Ghost Pizzas completely (dough, sauce, cheese ghosts, and olive eyes) and refrigerate them on the baking sheet for up to 24 hours before baking. Just cover them loosely with plastic wrap. Add an extra 2-3 minutes to the baking time if baking from cold.
How do I avoid common mistakes with mini ghost pizzas?
To avoid common pitfalls, first, don’t over-roll your dough; keep it at ¼-inch thickness for a good base. Second, ensure your oven is fully preheated to prevent a soggy bottom. Lastly, resist the urge to open the oven door too often, as this can drop the temperature and affect the melt and bake of your delightful mini ghost pizzas.
Best Ways to Serve Adorable Mini Ghost Pizzas
Once your amazing Adorable Mini Ghost Pizzas are out of the oven and slightly cooled, it’s time to enjoy them! I’ve found a few ways that truly elevate the experience, whether you’re hosting a party or just having a fun family meal.
For a festive Halloween party spread, arrange these mini ghost pizzas on a large platter alongside some “witch’s brew” punch and a bowl of “mummy” hot dogs. They make fantastic finger food, perfect for little hands and big appetites. These are definitely a hit among Halloween food ideas.
Another great way to serve them is as a fun, themed appetizer before a more substantial Halloween dinner. Pair them with a simple green salad dressed with a light vinaigrette to balance the cheesy goodness. You could also offer a side of warm marinara sauce or a creamy ranch dip for extra dipping fun. The creativity of these Adorable Mini Ghost Pizzas makes them a versatile and delightful addition to any spooky celebration.
Nutrition Facts for Adorable Mini Ghost Pizzas
I know many of you are curious about the nutritional breakdown of these fun treats, so I’ve put together the estimated facts per serving. Each recipe makes 10-12 Adorable Mini Ghost Pizzas.
- Serving Size: 1 mini pizza
- Calories: 130 kcal
- Protein: 6 g
- Fat: 6 g
- Saturated Fat: 2.5 g
- Unsaturated Fat: 2 g
- Trans Fat: 0 g
- Carbohydrates: 14 g
- Fiber: 1 g
- Sugar: 1 g
- Sodium: 280 mg
- Cholesterol: 15 mg
Nutritional values are estimates and may vary based on specific ingredients and brands used in your Adorable Mini Ghost Pizzas.
How to Store and Reheat Adorable Mini Ghost Pizzas
I often make a double batch of these Adorable Mini Ghost Pizzas because they store and reheat so wonderfully! After baking, allow them to cool completely on a wire rack. This is crucial to prevent sogginess when storing.
For refrigeration, place the cooled mini pizzas in an airtight container with parchment paper between layers to prevent sticking. They will stay fresh in the fridge for 3-4 days, making them a great option for an easy Halloween dinner or snack. To reheat, pop them in a preheated oven at 350°F (175°C) for 5-7 minutes, or until the cheese is bubbly again. You can also use a toaster oven for quick reheating.
If you’re planning further ahead, these Adorable Mini Ghost Pizzas freeze beautifully! Once completely cooled, arrange them on a baking sheet and freeze for about an hour until solid. Then, transfer them to a freezer-safe bag or container, separating layers with parchment. They’ll keep in the freezer for up to 3 months. Reheat from frozen in the oven at 375°F (190°C) for 10-15 minutes, or until heated through.
Frequently Asked Questions About Adorable Mini Ghost Pizzas
Can I use different cheese for my Adorable Mini Ghost Pizzas?
While mozzarella is ideal for its melt and ghost-like appearance, you can certainly experiment! Provolone or a mild white cheddar can also work, though they might not hold the ghost shape as distinctly. Just ensure it’s a low-moisture cheese to prevent excessive melting and spreading. My family prefers the classic mozzarella for these fun Halloween snacks.
What if I don’t have a ghost cookie cutter?
No problem at all! I often just use a small, sharp knife to carefully cut out ghost shapes from the mozzarella block. Think of a simple rounded top with two wavy sides tapering down. It doesn’t have to be perfect; the charm of these Adorable Mini Ghost Pizzas is in their homemade, whimsical look. You can even freehand some fun, spooky shapes!
Can I add other toppings to these mini ghost pizzas?
Absolutely! Feel free to customize your Adorable Mini Ghost Pizzas. I recommend adding very finely chopped veggies, like bell peppers or mushrooms, under the cheese ghost so they don’t obscure the design. Just be mindful not to overload them, as too many toppings can make them soggy or prevent the cheese from melting properly. Small pieces of cooked pepperoni also work great for extra flavor, making them even more substantial Halloween snacks.
Are these Adorable Mini Ghost Pizzas suitable for younger children?
Yes, they are perfect for younger children! The bite-sized nature makes them easy for little hands to manage. Plus, the fun ghost shapes are a huge hit with kids, encouraging them to eat. Just be sure to let them cool sufficiently after baking to avoid burns. They’re a fantastic, interactive Halloween snack that even picky eaters usually enjoy.
Variations of Adorable Mini Ghost Pizzas You Can Try
I love how versatile these Adorable Mini Ghost Pizzas are! You can easily tweak them to fit different tastes or dietary needs, making them even more inclusive for your Halloween gatherings. Here are a few creative variations I’ve explored:
- Gluten-Free Ghosts: Easily make these gluten-free by using a pre-made gluten-free pizza crust or dough. Just follow the package instructions for baking time, as it might differ slightly. You’ll still get those charming ghost shapes!
- Veggie-Loaded Spooky Pizza: For a healthier twist, finely chop some spinach, bell peppers, or mushrooms and mix them into your pizza sauce before spreading. You can also add thin slices of olives or tiny pieces of roasted red pepper under the cheese ghosts for extra flavor and color.
- Spicy Goblin Pizzas: If you like a little heat, add a pinch of red pepper flakes to your pizza sauce, or sprinkle some on top before baking. You could even use small pieces of jalapeño for the “eyes” instead of olives for a truly fiery spooky pizza experience.
- Dessert “Ghost” Pizzas: For a sweet treat, use a sugar cookie dough base, spread with cream cheese frosting, and top with white chocolate ghosts and mini chocolate chip eyes. It’s a fun, family-friendly twist on the concept!

10 Adorable Mini Ghost Pizzas: A Frightfully Delicious Treat
- Total Time: 27 minutes
- Yield: 10–12 mini pizzas 1x
- Diet: Vegetarian
Description
These Adorable Mini Ghost Pizzas are a fun and spooky snack perfect for Halloween. Made with pizza dough, tomato sauce, mozzarella, and olive eyes, these mini ghost pizzas are a delightful and creative twist on traditional mini pizzas. They are quick to assemble, easy to customize, and freezer-friendly, making them ideal for Halloween parties or themed lunchbox treats.
Ingredients
- 1 can (13.8 oz) refrigerated pizza dough
- ½ cup pizza sauce
- 8 oz mozzarella cheese block or slices
- 8 to 10 black olives
- 1 tablespoon olive oil
- All-purpose flour for dusting
Instructions
- Lightly flour a clean surface and roll out the pizza dough to about ¼-inch thickness. Using a round cookie cutter (about 3 inches in diameter) or a glass, cut out mini pizza bases. Transfer them to a parchment-lined baking sheet.
- Preheat your oven to 400°F (200°C). While it heats, slice your mozzarella into roughly ¼-inch thick pieces. Use a ghost-shaped cookie cutter or a sharp knife to cut out little ghost figures. Set aside. Slice black olives in half lengthwise, then cut them into small oval ‘eyes’.
- Spread a thin layer of pizza sauce onto each dough circle using a spoon. Be careful not to overdo it—just enough to cover the center, leaving a small border.
- Gently place one mozzarella ghost onto the center of each mini pizza. Add two olive ‘eyes’ to each ghost, pressing them lightly into the cheese so they stick.
- If you want a golden crust, lightly brush the exposed dough edges with olive oil.
- Bake the mini pizzas in the preheated oven for 10–12 minutes, or until the cheese is melted and just slightly golden, and the dough is puffed and lightly browned at the edges.
- Let the pizzas cool for 3–5 minutes before serving. This helps the cheese set and avoids burning little mouths!
Notes
- Use low-moisture mozzarella slices or a block you can cut—fresh mozzarella tends to release too much moisture and can distort the ghost shape.
- You can use homemade dough, store-bought dough, or even pre-made mini naan or flatbreads for a shortcut.
- Make sure your mozzarella ghosts fit neatly onto the dough rounds. If they’re too big, they’ll melt over the edge and lose their shape.
- Use just a thin layer of sauce to keep the mini pizzas from becoming soggy.
- Lightly flour your surface and rolling pin to prevent sticking without drying out the dough.
- A quick 10-minute chill in the fridge helps hold the shape better, especially if the kitchen is warm.
- Prep Time: 15 minutes
- Cook Time: 12 minutes
- Category: Appetizer / Snack
- Method: Baking
- Cuisine: American
Nutrition
- Serving Size: 1 mini pizza
- Calories: 130 kcal
- Sugar: 1 g
- Sodium: 280 mg
- Fat: 6 g
- Saturated Fat: 2.5 g
- Unsaturated Fat: 2 g
- Trans Fat: 0 g
- Carbohydrates: 14 g
- Fiber: 1 g
- Protein: 6 g
- Cholesterol: 15 mg